Arboair

Knowledge Hub

Guides, answers and training material for Arboair's services.

Drone guide - DJI M3E (Swedish course)

Updated

Before following the guide, make sure the drone is powered on and has a memory card inserted.

The guide applies when you have imported a KML file (for example from the Arboair portal) for your flight route.

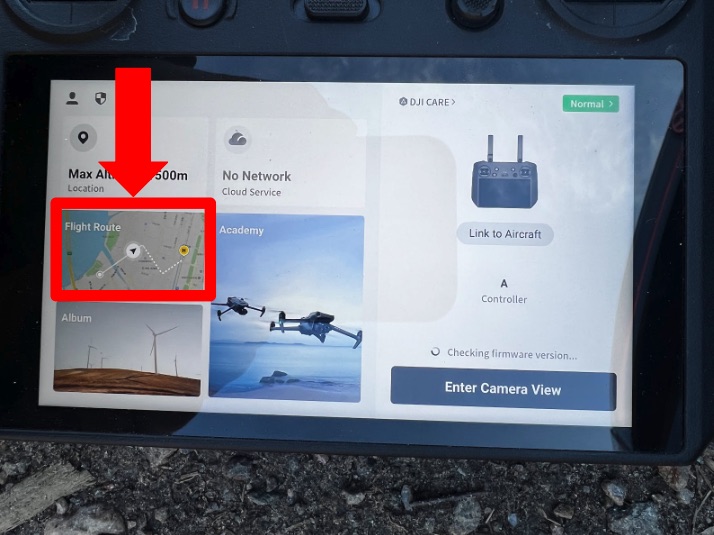
  1. Start the controller. Press "Flight route"

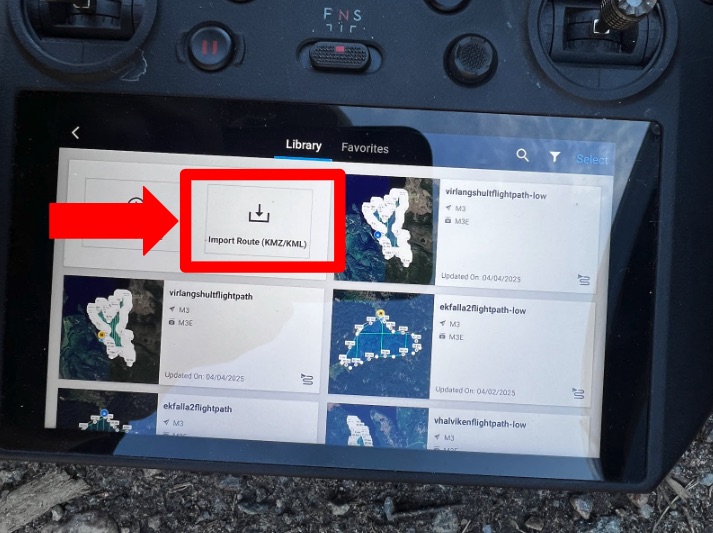
  1. Press "Import Route"

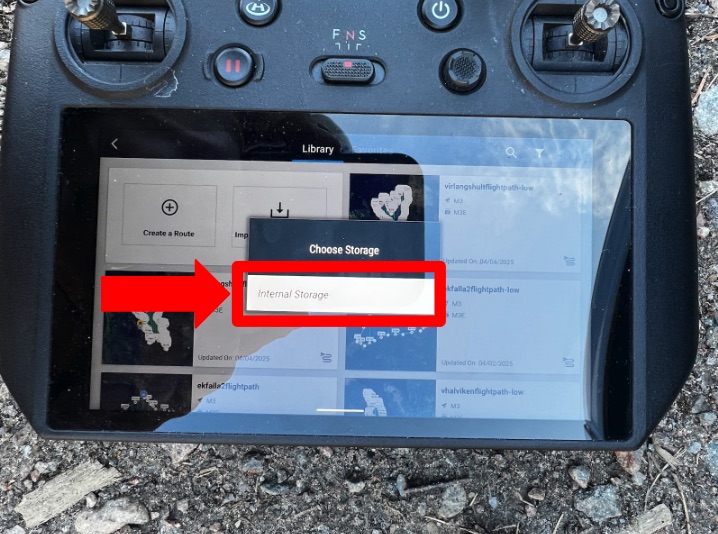
  1. Select "Internal Storage"

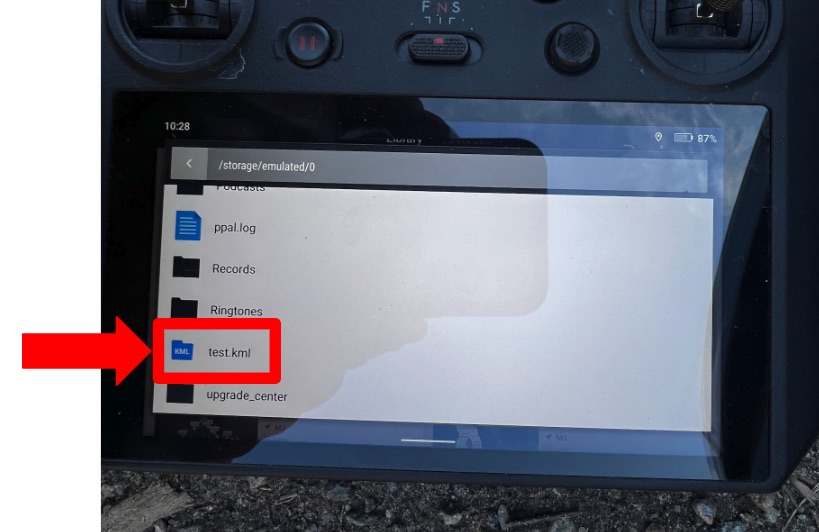
  1. Select the file you transferred with the area to be flown.

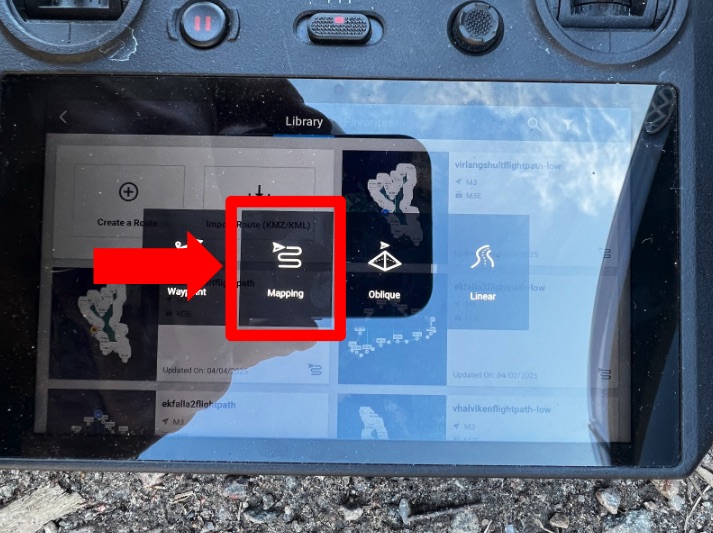
  1. Select "Mapping"


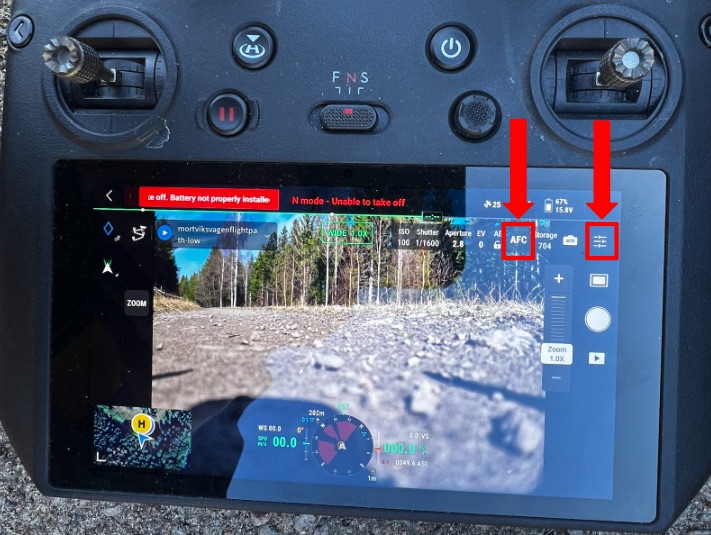
  1. Make sure it is set to AFC (Auto Focus Continuous) — so the drone adjusts the camera focus correctly by itself. If you want to change the image format, press the settings button in the top right corner to bring up the next menu.

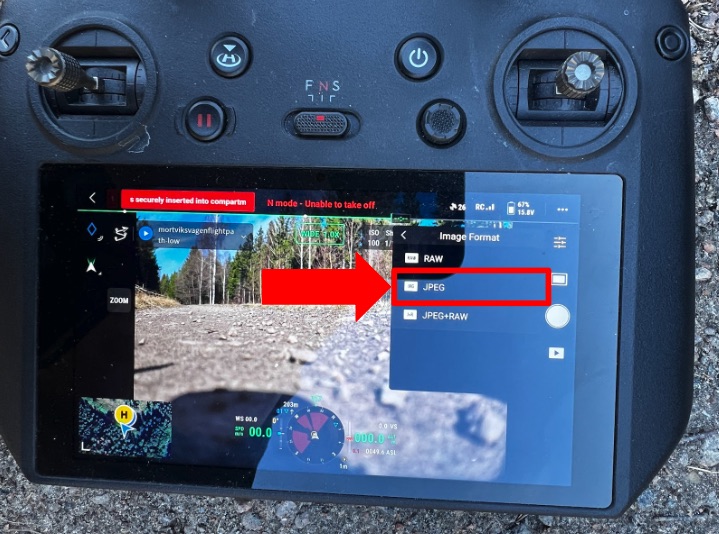
  1. Select the desired image format — use JPEG

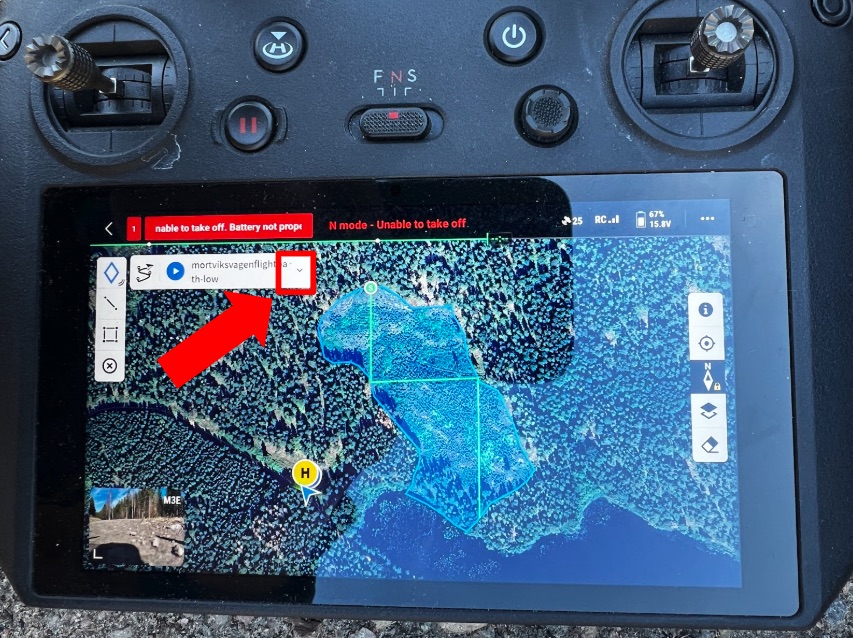
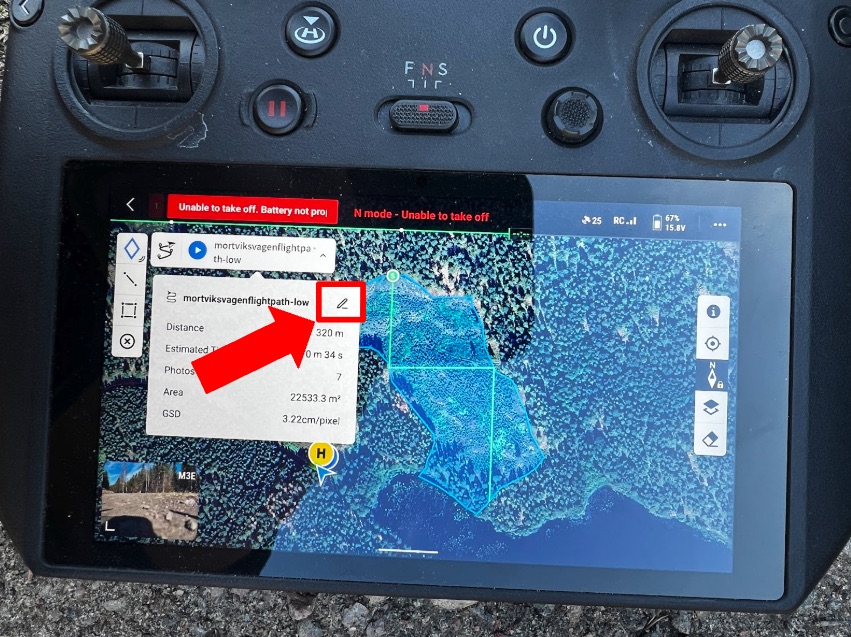
  1. Press the down arrow next to the mission name

  1. Go into settings

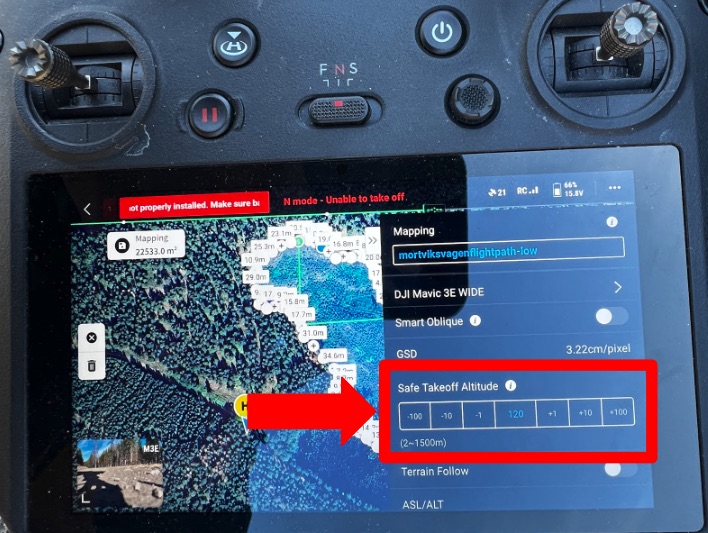
  1. Set "Safe Takeoff Altitude" to 120 m.

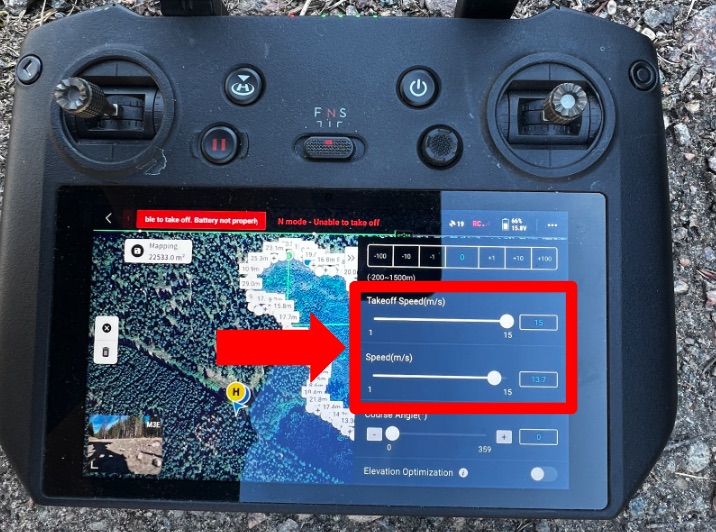
  1. Set Takeoff Speed to 15 m/s and Speed to 13.7 m/s.

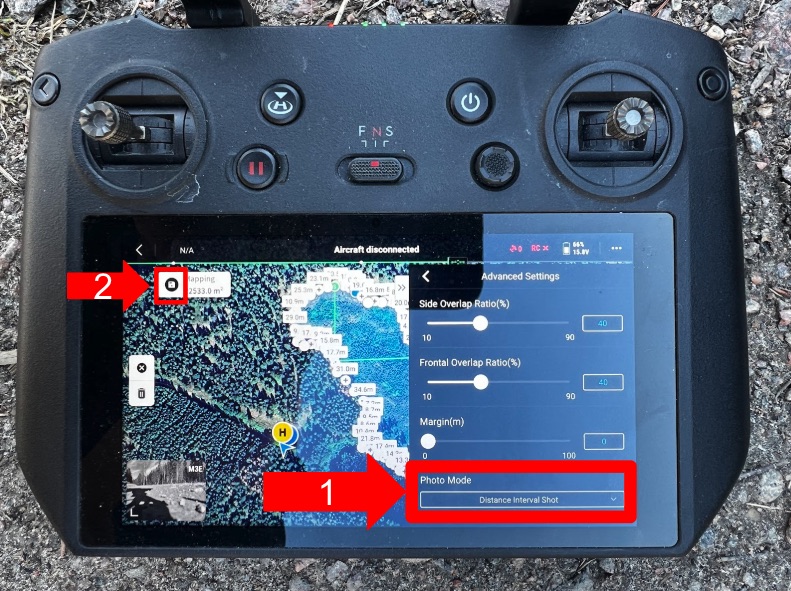
  1. Scroll to the bottom and press "Advanced settings"

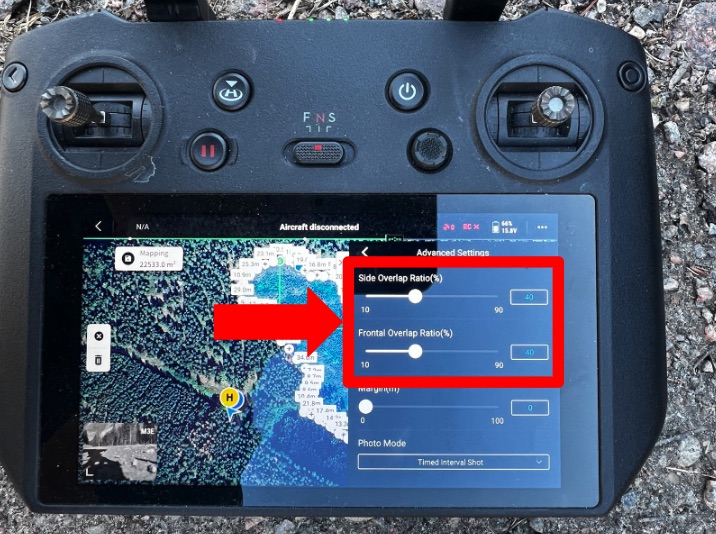
  1. Set both Side Overlap and Frontal Overlap to 40%


14.

Change "Photo Mode" to "Distance Interval Shot" (1)

Then press the save icon in the top left corner (2)


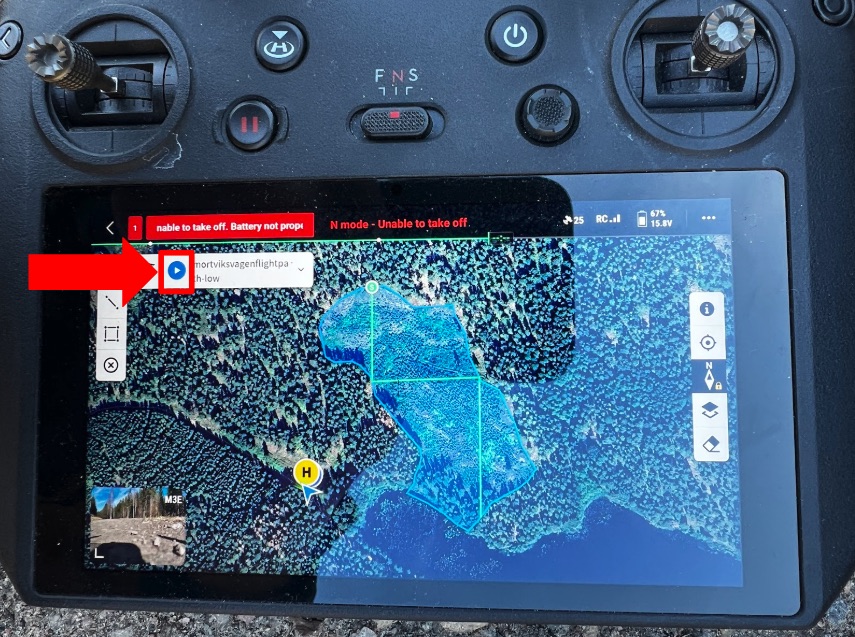
  1. Press the play button in the top left corner.

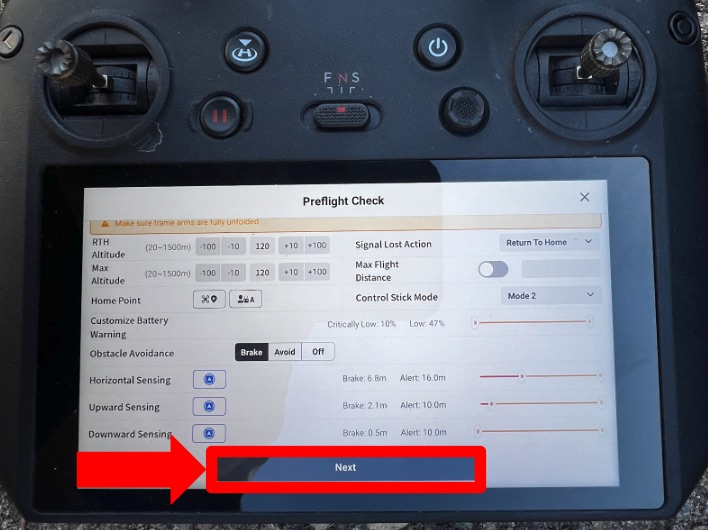
  1. Scroll down and press "Next"

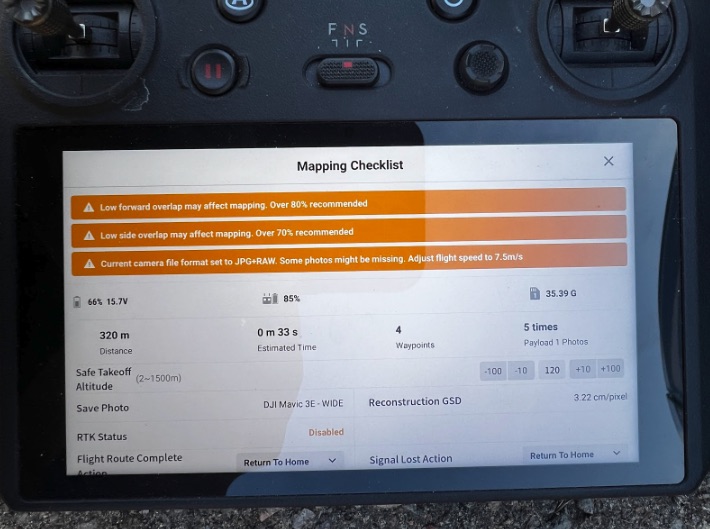
This is a good opportunity to check the settings made in this guide

  1. Warnings about low overlap will be shown — ignore these.

When the guide image was taken we used a different image format; you should not see the third warning


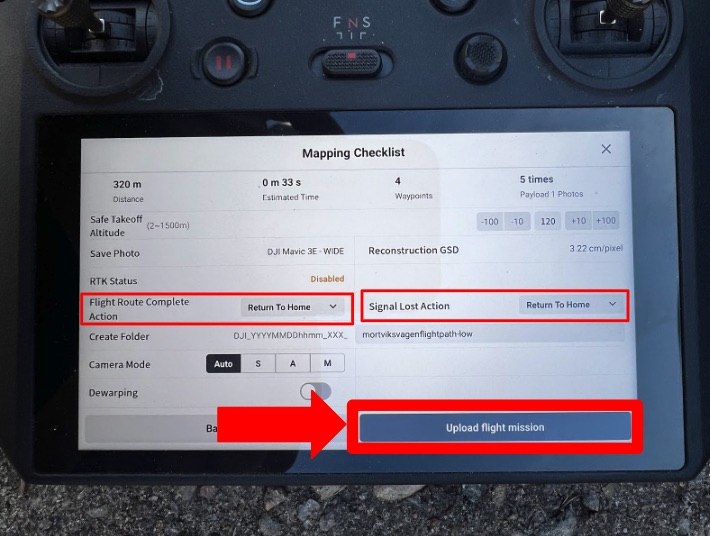
  1. Check that "Flight Route Complete Action" and "Signal lost action" are set to "Return to home"

Press "Upload flight mission"


NOTE! Don't forget to take a starting picture BEFORE you fly (press the button at your right index finger to take a starting picture)!


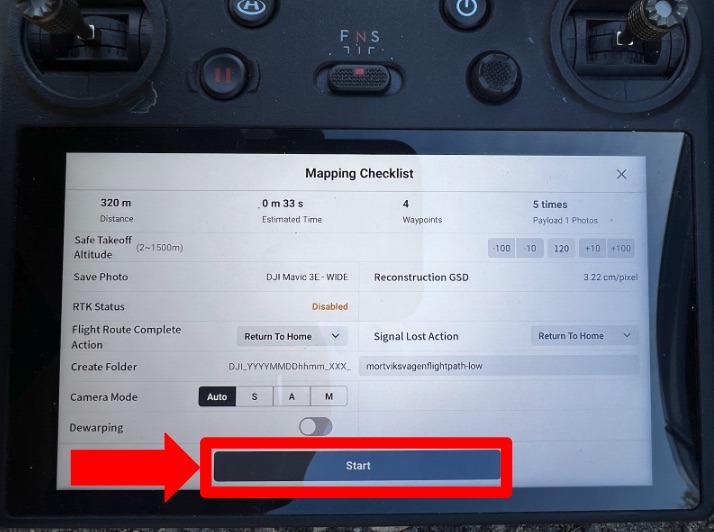
  1. Press "Start" to start the flight mission


Was this article helpful?